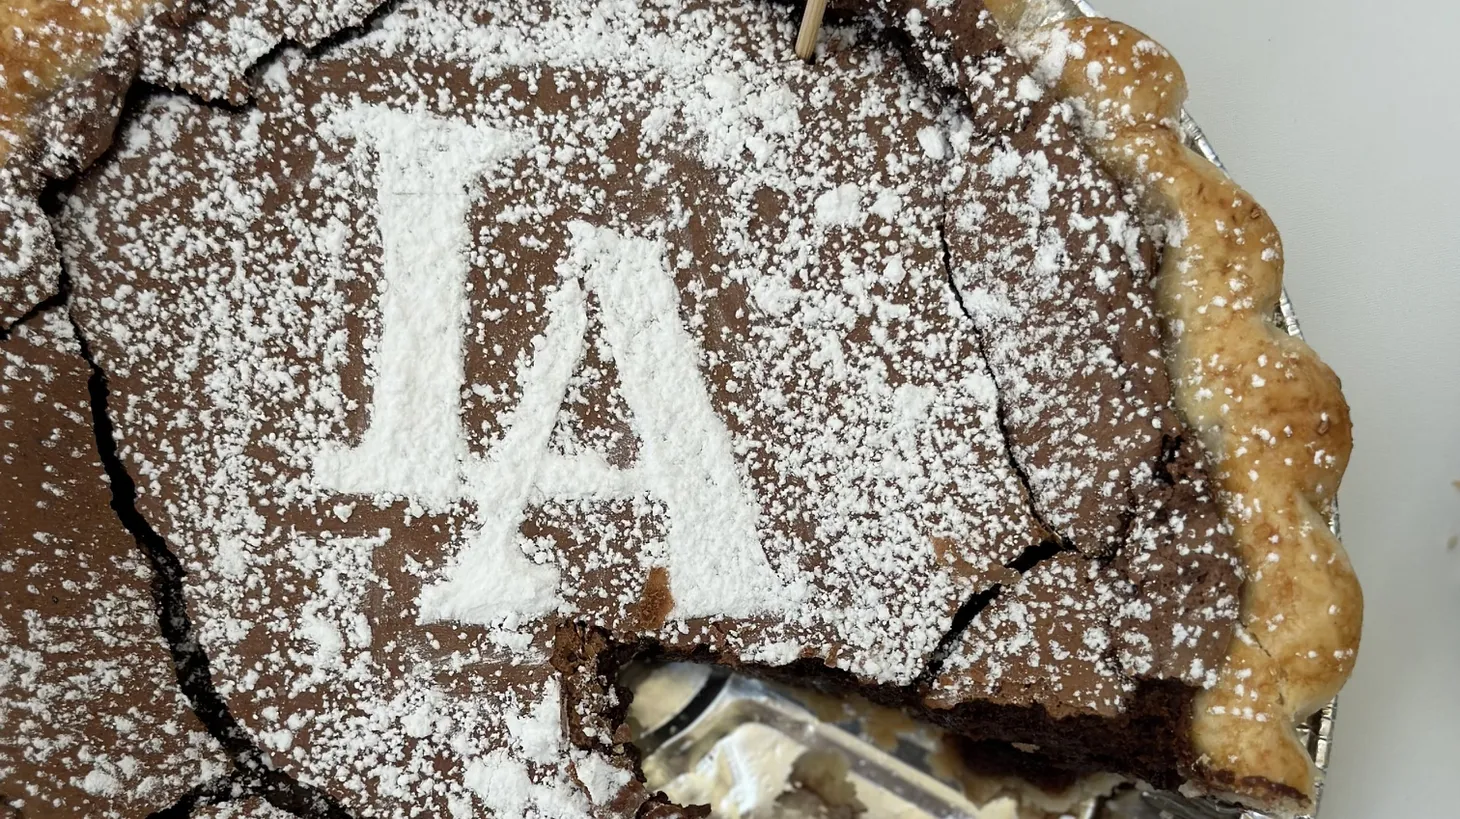
You asked, these bakers answered. Here are six winning pie recipes from the 2023 KCRW Good Food PieFest & Contest. There are five pie recipes (three sweet, two savory) and one pie crust recipe.
FYI: We emailed every winning baker, but not all wanted to share their recipes. Click here for a full list of pie winners.
1. Yuichiro Suzuki's Sukiyaki Pie -- (Lineage)
2. Sirinda Sincharoen's Mississippi Mud Pie -- (Cream)
3. Annette Eason's Sweet Potato Black Bean Pork with Chipotle -- (Savory)
4. Virginie Strub's Lemon Cream Pie -- (Prettiest)
5. Oliver Kaplan's Blueberry Pie Recipe -- (Kids)
6. Scott Blindauer's Award-Winning Crust Recipe -- (Best Crust)
1. Yuichiro Suzuki's Sukiyaki Pie
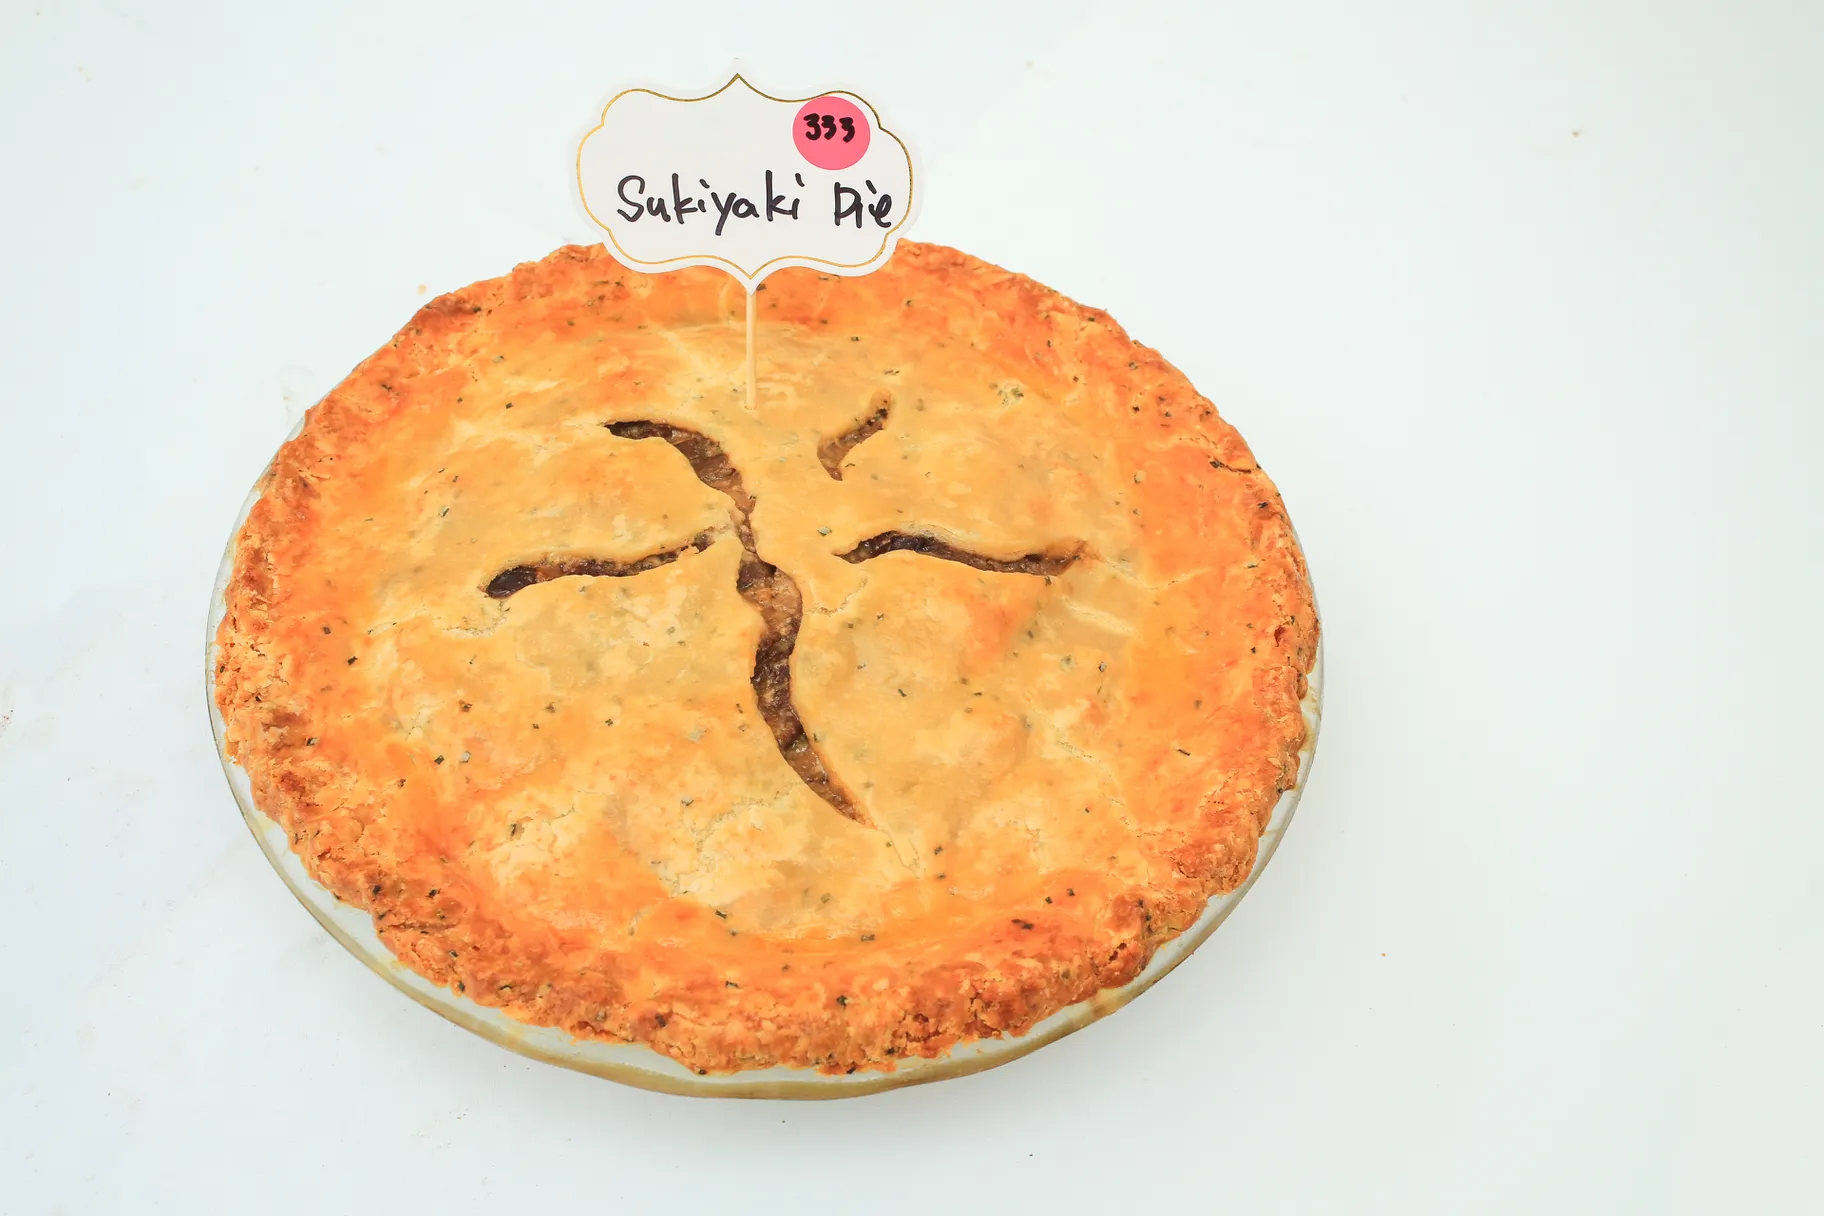 Yuichiro Suzuki's Sukiyaki Pie was the top Lineage Pie, a category that asked contestants to use globally-inspired flavors and their heritage to create a pie that tells a personal story. Photo by Ian Kose
Yuichiro Suzuki's Sukiyaki Pie (#333) won the Lineage Pie category. He explains:
"Eating beef in Japan only came into vogue when the Meiji Emperor encouraged its consumption in the face of western Imperialism to make relatively smaller Japanese bodies larger and stronger. Sukiyaki was one of the dishes that emerged from that time. It is a dish that is rooted in adaptation to challenge. The lineage of this pie is a Japanese expression of a meat pie. My classic Western meat pie won the KCRW 2010 Pie Contest. Like that original pie, this is crafted by community. From the cheeses sourced by my friends at Cheese Cave in Claremont to the private label wagyu from Masami Cattle Ranch in Corning, California to the group of close friends who provided essential taste-testing feedback as I developed the recipe.
This pie connects the threads of my life after leaving Japan and establishing a new one in California. After my wife graduated from the Peter F. Drucker School of Management in Claremont, we moved to the Bay Area. However, after more than a decade, we decided Claremont is where our hearts (and bodies) truly belong. So this pie is a tribute to the place we feel most at home in the world."
Yuichiro Suzuki's Sukiyaki Pie
Makes 2 Pies
Ingredients
Warishita (Base Broth/Seasoning)
- 240 ml sake
- 90 ml mirin
- 300 ml soy sauce
- 4-5 tbsp. sugar
- 2 tbsp. shoyu Koji (optional)
- 75 ml sherry (preferably Pedro Ximénez)
- 75 ml apple juice
- 2" x 1" dried kombu (seaweed)
Crust
- 360g AP flour
- Pinch of Salt
- 140g unsalted european butter
- 100g lard
- 2 tbsp. chives, chopped
- 120g goat cheese (preferably Pantaleo) — shredded
- 2 tsp. apple cider vinegar
- 2 tbsp. ice cold water
- 1 egg
Mashed Potato
- 5-6 Yukon Gold potatoes
- 6 tbsp. unsalted butter
- 6 tbsp. half and half
- Salt to taste
Filling
- 3 lbs. Masami Beef Zabuton (Denver steak) — thin sliced
- 2 tbsp. beef fat
- ¼ cut Napa cabbage — cut ½" dice
- 1 onion — cut ¼" julienne
- 2 carrot — peel and cut ¼" small slice
- Burdock root – peel and cut ¼" small slice
- 4 shiitake mushrooms — cut ¼" small slice
- 1 pack shimeji mushrooms — cut off stem and shred
- 1 pack maitake mushrooms — cut off stem and shred
- 1 pack enoki mushrooms – cut off stem and shred
- 1 pack Yaki tofu — cut ¼" small dice
- 1 pack shirataki — cut 1"
- 5 mochi — cut ¼" small dice
- One handful shungiku (chrysanthemum greens) — cut ½"
- 6 Tokyo negi — cut ¼" small slice
- 6 eggs
Instructions
Day 1: Make Warishita
- Combine the sake and mirin in a small saucepan and bring it to boil.
- Once boiling, reduce heat to simmer and let alcohol evaporate for a minute or so.
- Add sugar and completely dissolve.
- Add remaining ingredients and keep mixture in the fridge overnight.
Day 2: Make Mashed Potato, Crust and Filling
Mashed Potato
- Wash potatoes well and take out all the sprouts.
- In a large pot place all potatoes and fill the pot with cool water. Add some salt and bring this to boil. Cook until potatoes are tender, about 15-20 minutes.
- Drain potatoes. Peel all skin with a dry towel.
- Place potatoes in a large bowl, add butter and half and half. Mash potatoes until smooth. Season with salt and let the mashed potatoes cool.
- Preheat the oven 425°F.
- Grease a 9" pie dish with butter.
- Place the mashed potatoes in the bottom like a pie crust.
- Bake the potatoes for 10-15 minutes.
- Let cool then cover with plastic wrap and keep it in the fridge overnight.
Crust
- Combine the cold AP flour and salt in the bowl of a stand mixer fitted with a paddle attachment.
- Mix for a few seconds.
- Cut cold lard and butter into small chunks, like a ⅛" dice. Add the butter pieces and lard into the flour mixture.
- Mix on the lowest setting possible until it has the consistency of damp sand.
- Add chives and cheese. Mix for 15-30 seconds.
- Using a fork, beat the egg with ice cold water and cold vinegar.
- Slowly pour the egg mixture over the flour, stirring only until the mixture is moist. The dough should stick together and be able to hold the shape of a ball.
- Divide the dough into two balls and wrap each one in plastic wrap. Chill in the fridge overnight.
Filling
- Rince the shirataki noodles well.
- Fill a small pot with water, bring to a boil and cook the shirataki for 2-3 minutes.
- Drain the noodles and set aside.
- Using a cast iron pan or pot that's at least 2 inches deep, cook the Tokyo negi with beef fat until the negi is golden brown. Set aside.
- Using the same pan, sear the beef lightly, approximately 50%.
- Add Warishita. Mix well and set aside in a bowl. Do not fully cook the beef.
- Wipe down the pan and cook the onion, carrot and burdock root until the onion turns translucent.
- Add mushrooms, shirataki, tofu, and warishita. Cook for 10- 15 minutes.
- Add mochi, napa cabbage and shungiku. Add more warishita if needed and add juice from beef. Cook for about 10 minutes until mochi starts melting.
- Add all the beef and mix well. Taste broth and add more warishita. The beef mixture could be salty at this point because you will add eggs.
- Beat 6 eggs and slowly add. Cook for 30 seconds.
- Cool the sukiyaki and place it in the fridge overnight.
Day 3: Assemble and Bake
- Preheat the oven to 425°F.
- Place the filing on the mashed potato.
- Beat 1 egg with 1 tbsp of water and moisten the edge of the pie plate.
- Roll out pie crust into a 10" round (big enough to cover your pie plate).
- Crimp the edges and make 4-6 slits in the crust.
- Use a pastry brush to brush lightly over the pie crust.
- Bake for about 15 minutes. Lower the temperature to 350°F and continue baking for 35-45 minutes, or until the crust is golden brown. Enjoy!
2. Sirinda Sincharoen's Mississippi Mud Pie
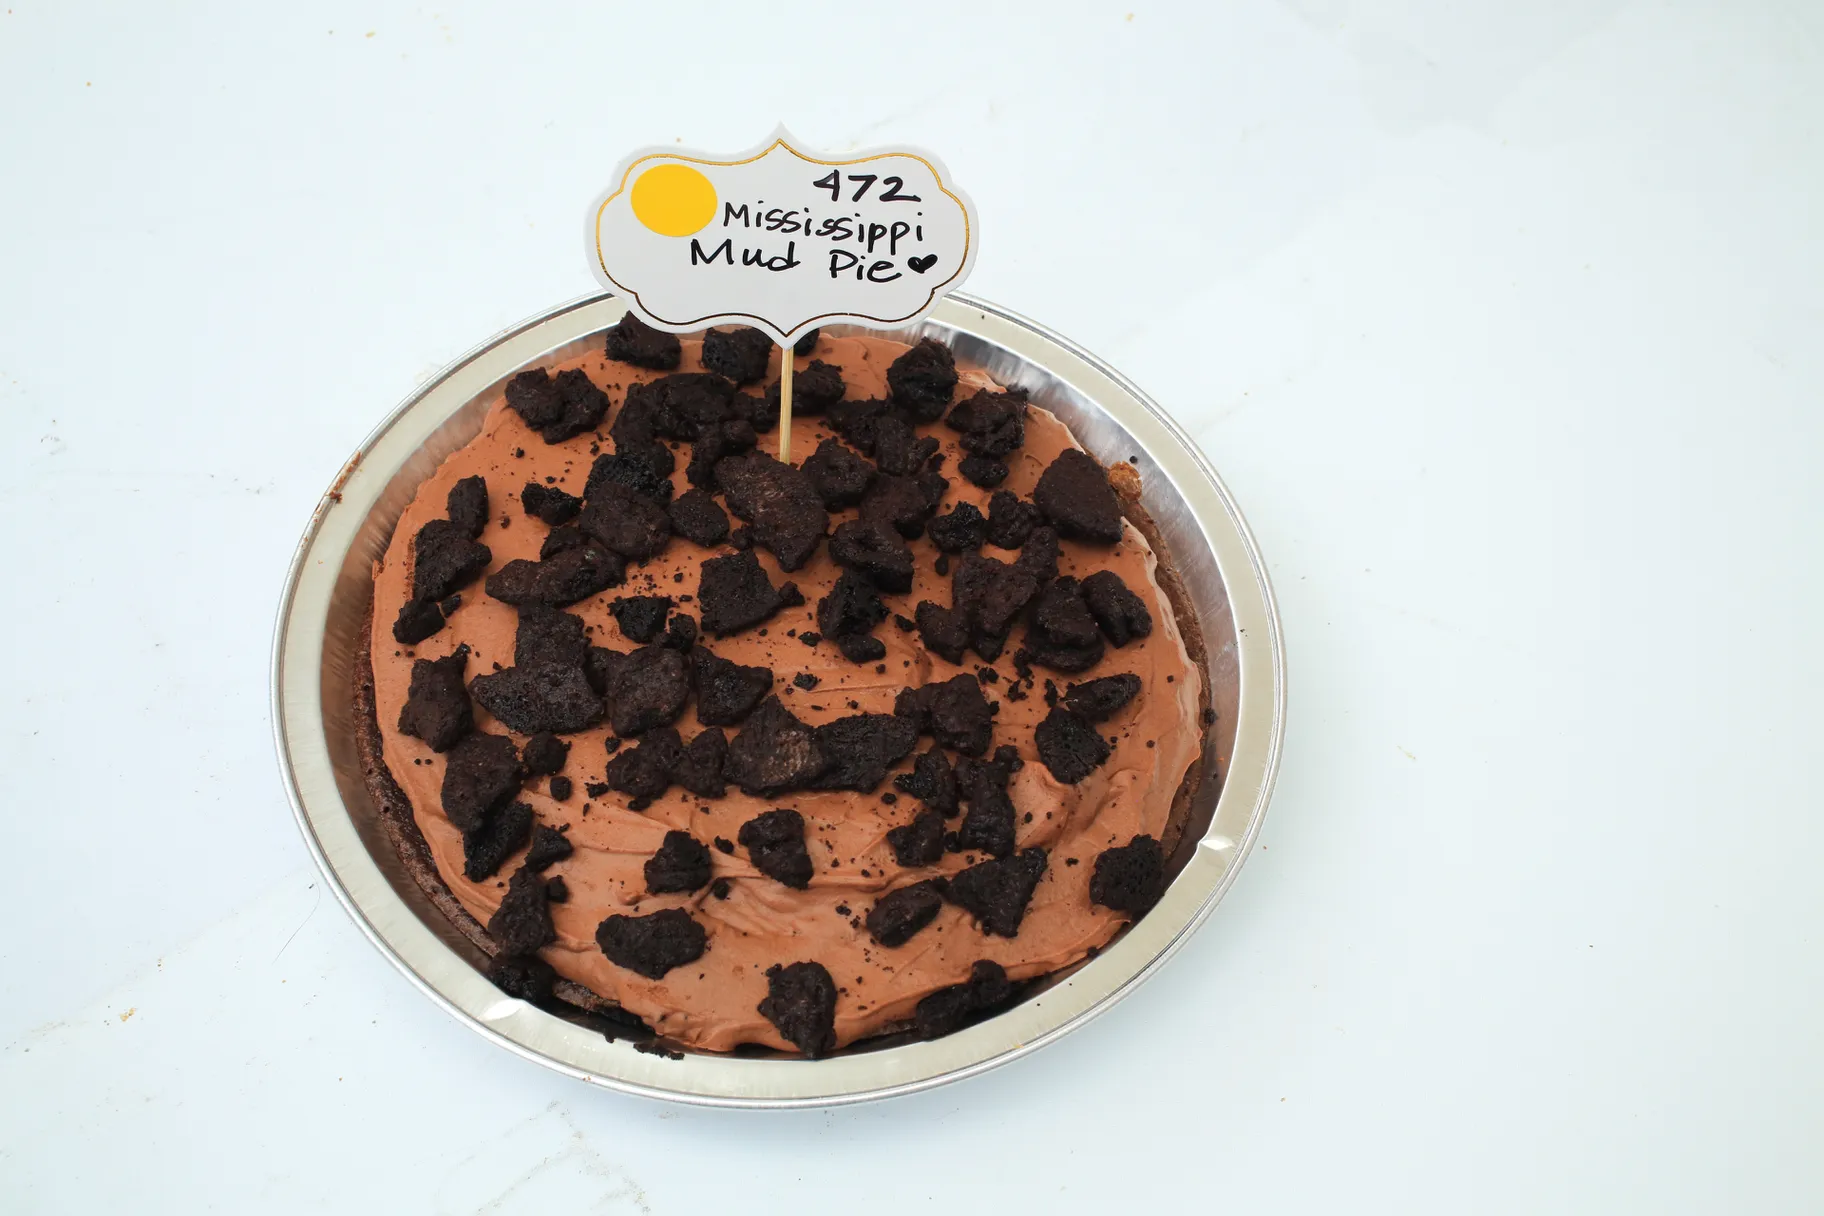 Sirinda Sincharoen's Mississippi Mud Pie won the Cream category. Photo by Ian Kose
Sirinda Sincharoen's Mississippi Mud Pie (#472), which comes from Cook's Illustrated All-Time Best Chocolate Desserts, won the Cream category at this year's PieFest. Want to make it yourself? It's not going to be easy. As Sirinda explains,
"This pie has several steps and requires a bit of cooling time, so make sure to set aside at least 5 hours from start to completion. You'll also need to use a food processor and a stand mixer. But the pie is so delicious, it's worth the work and the wait!"
Sirinda Sincharoen's Mississippi Mud Pie
Ingredients
Cookie Crust
- Approximately 25-30 chocolate wafers (5½ oz.), broken into coarse pieces
- 4 tbsp. unsalted butter, melted
Brownie Layer
- 4 oz. bittersweet chocolate, chopped fine
- 3 tbsp. unsalted butter
- 3 tbsp. vegetable oil or other neutral flavor oil
- 1½ tbsp. Dutch-processed cocoa powder
- ⅔ cup (4⅔ oz.) dark brown sugar
- 2 large eggs
- 2 tsp. vanilla extract
- ¼ tsp. salt
- 3 tbsp. all-purpose flour
Cookie Topping
- Approximately 10-15 chocolate wafer cookies (2 oz.)
- 2 tbsp. confectioners' sugar
- 1 tbsp. Dutch-processed cocoa powder
- ⅛ tsp. salt
- 2 tbsp. unsalted butter, melted
Mousse
- 6 oz. milk chocolate, chopped fine
- 1 cup heavy cream, chilled
- 2 tbsp. Dutch-processed cocoa powder
- 2 tbsp. confectioners' sugar
- ⅛ tsp. salt
Instructions
Cookie Crust
- Heat oven to 325°F, and adjust the oven rack to the middle of the oven.
- Finely grind cookie pieces in a food processor (about 30 seconds).
- Add melted butter, and pulse until combined (about 6 pulses).
- Press crumbs firmly into the bottom and up the sides of a 9-inch pie plate.
- Use the bottom of a cup or a pie tamper to press the crumbs in evenly.
- Bake until fragrant and set, about 15 minutes.
- Cool on a wire rack.
Brownie Layer
- Combine chocolate, butter, oil, and cocoa in a microwave-safe bowl, and microwave (stirring often) until melted (about 1½ minutes).
- In a separate bowl, whisk together sugar, eggs, vanilla, and salt until smooth.
- Whisk in the melted chocolate mixture until well combined.
- Whisk in flour until just combined.
- Pour the brownie batter into the chocolate wafer crust (crust does not need to be completely cooled).
- Bake at 325°F until the edges begin to set, and a toothpick inserted into the center comes out with a thin coating of batter attached (about 15 minutes). Don't overbake the brownie as it will further set as it cools.
- Transfer to a cooling rack, and cool for 1 hour, then refrigerate until fully chilled, about 1 hour longer.
Cookie Topping
*While the brownie layer is cooling/chilling, make the chocolate cookie crumble topping.
- Line a rimmed baking sheet with parchment paper.
- Put chocolate wafer cookies in a zipper-lock bag, press the air out, and seal the bag. Use a rolling pin or your hands to crush the cookies into ½ to ¾ inch pieces.
- Combine the crushed cookies, sugar, cocoa powder, and salt in a bowl.
- Stir in melted butter until the mixture is moistened and clumps begin to form.
- Spread the crumbs in an even layer on the prepared baking sheet, and bake until fragrant (about 10 minutes).
- Shake the baking sheet halfway through baking to break up the crumbs.
- Transfer the sheet to a cooling rack to cool completely.
Mousse
- When the brownie layer is fully chilled, microwave chocolate in a large bowl, stirring often until melted (1½ to 2 minutes). Set aside and let cool until barely warm (about 90° to 100° degrees), about 10 minutes.
- In the meantime, microwave 3 tablespoons of cream in a small bowl (to about 105°-110° degrees) for about 15 seconds.
- Whisk cocoa into the warm cream.
- Combine sugar, salt, cocoa-cream mixture, and remaining cream in the bowl of a stand mixer.
- Using a whisk attachment, whip the cream mixture on medium speed until it begins to thicken (about 30 seconds). Scrape down the bowl as needed. Increase the mixer speed to high, and whip until soft peaks form (1-2 minutes).
- Using a handheld whisk, fold ⅓ of the whipped cream mixture into the melted chocolate until mixed.
- Then use a rubber spatula to gently fold in the remaining whipped cream mixture until no dark streaks are visible.
Assembly
- Spoon the mousse over the brownie layer, spreading evenly from edge to edge.
- Sprinkle cookie topping over the mousse layer.
- Refrigerate for at least 3 hours or overnight. Then serve and enjoy!
3. Annette Eason's Sweet Potato Black Bean Pork with Chipotle
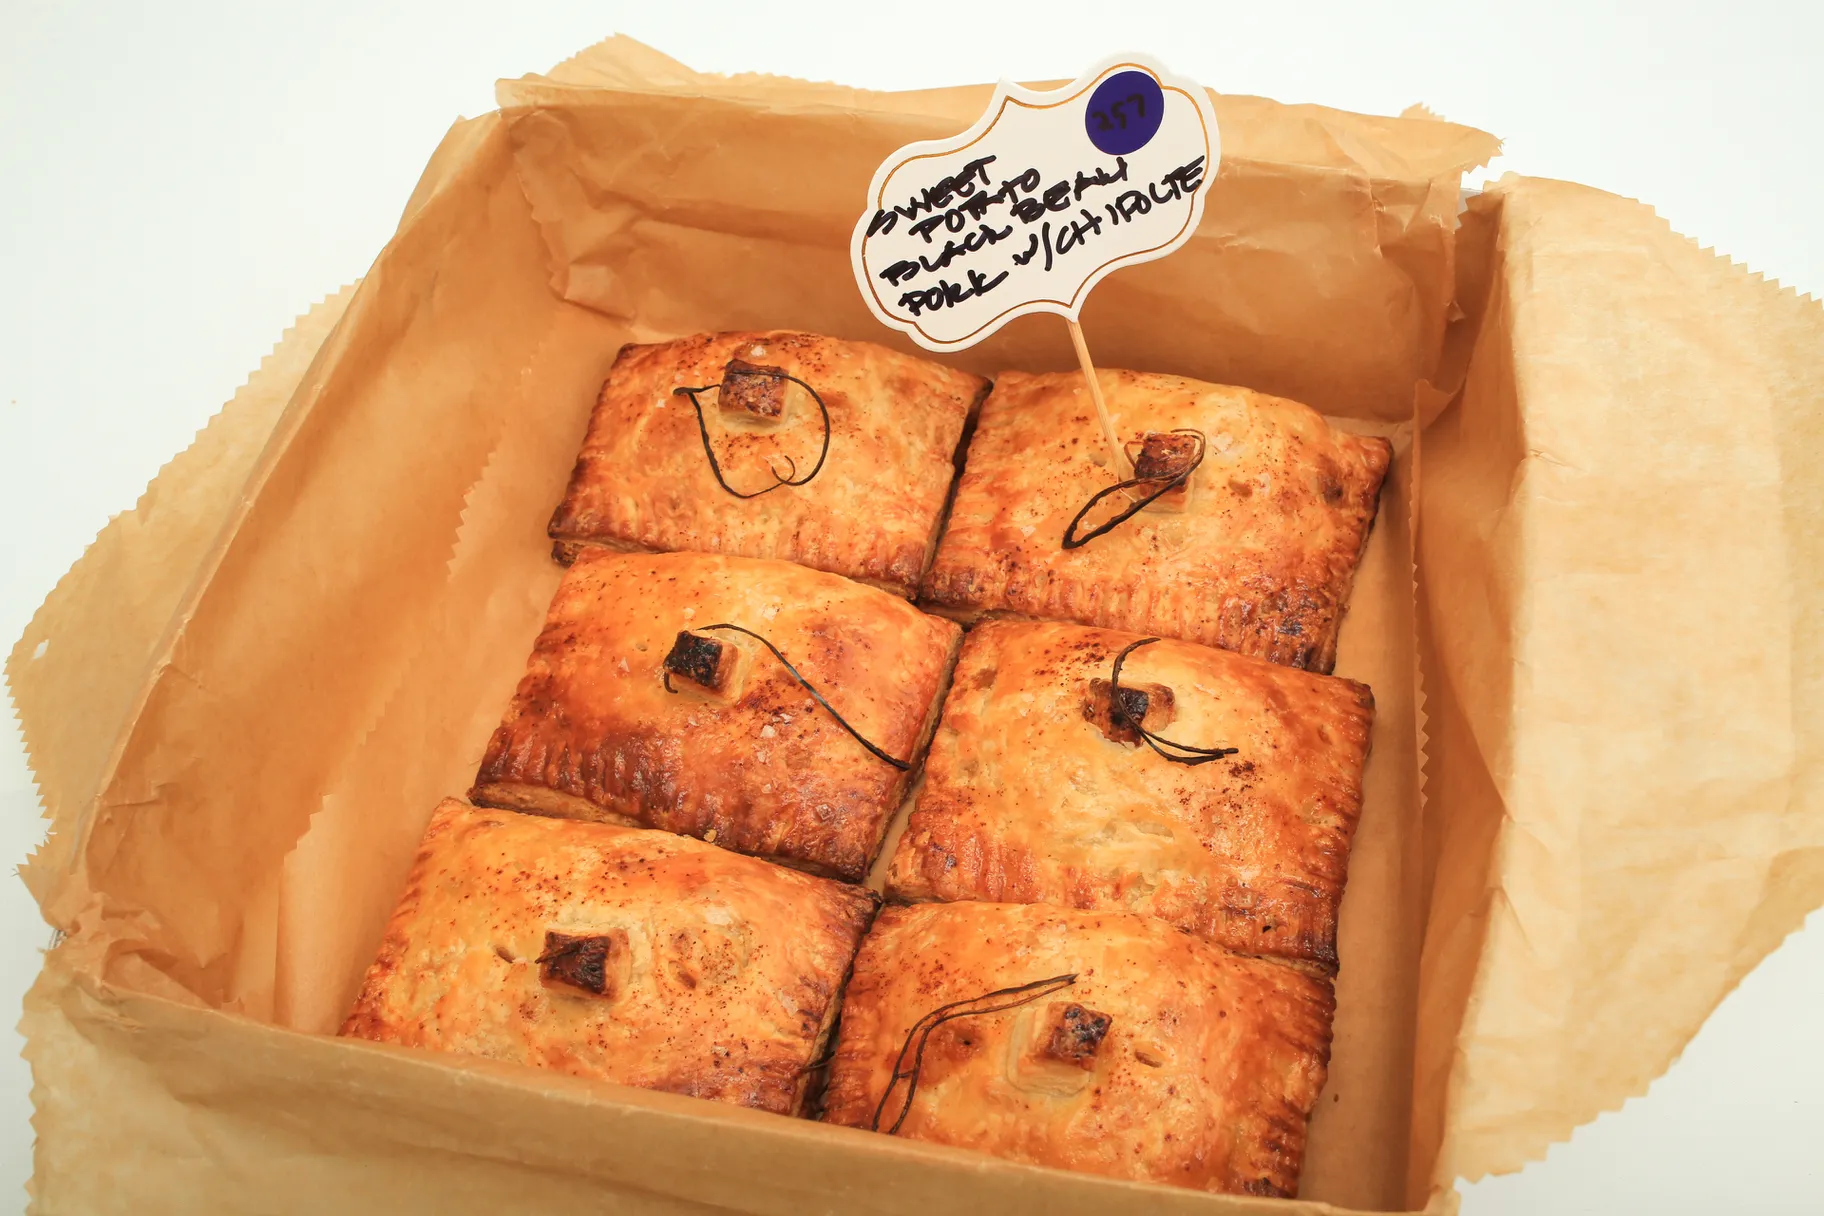
Annette Eason won the Savory Pie category with her perfectly seasoned Sweet Potato Black Bean Pork with Chipotle Pie. Photo by Ian Kose
This Sweet Potato Black Bean Pork with Chipotle Pie (#257) won Annette Eason the Savory category. She explains:
"In the contest recipe, for multiple reasons, I used all organic, sustainable or biodynamic ingredients. In this recipe I have listed some alternatives and specific products to help with some sourcing issues. The sugar and vinegar in the recipe are very important. Do not leave them out. Prep, measure and organize all the filling ingredients before you start. You won't want to stop in the middle of the cooking process. I highly recommend using the water method to cook the bacon for this recipe."
Annette Eason's Sweet Potato Black Bean Pork with Chipotle
Makes 12 hand pies
Ingredients
Crust
- 1 large egg for egg wash and sealing
- Smoked paprika
- Maldon flake salt
The Filling
- 2 strips of the smokiest bacon you can find
- ¼ lb. ground pork
- 1 large shallot, about 2 oz. chopped
- ¼ of a small sweet onion, about 2 oz. chopped
- 1 clove of garlic coarsely chopped
- 1 tbsp. tomato paste
- 10 oz. of sweet potato cut into ½ in. cubes (about 2 cups)
- 3 soft smoked chipotles from Windrose Farms (Wednesday Santa Monica Farmers Market), finely chopped OR 3 large chipotle peppers in adobo
- 1 tsp. cumin
- 1 tsp. smoked paprika
- 1½ tsp. dried oregano
- 1 tbsp. olive oil
- ¼ cup dry white wine
- 1 14.5 oz. can of chopped fire roasted tomatoes with green chiles (I recommend Trader Joe's organic for the price alone)
- 2 oz. diced canned mild green chiles (I use Rio Luna organic)
- 1 tbsp. sugar
- 1 15 oz. can od black beans well rinsed
- 2 tsp. Red wine vinegar
- ½ cup water
- Salt as needed
Instructions
- In a heavy, 4-quart pot, preferably an enameled cast iron pot, cook the bacon until it's crisp.
- Remove the bacon and let cool then crumble.
- Leave the bacon fat in the pot. Over medium-high heat, add the pork with a generous pinch of salt, cumin, smoked paprika and oregano. Brown the pork, breaking it up as it cooks.
- Push the pork to one side of the pot and add crumbled bacon, shallots and onion.
- Add another pinch of salt. Cook for 2-3 minutes and mix with pork.
- Add cumin, smoked paprika and oregano and let bloom.
- Add tomato paste and garlic. Cook for an additional 2 minutes.
- Add the finely chopped chipotles. A good fond should be starting to form on the bottom of the pan.
- Add the olive oil and sweet potato with a couple more pinches of salt. Stir to combine. Cook for an additional 1-2 minutes.
- Add the white wine to deglaze, scraping up all the fond from the bottom of the pot.
- Add the tomatoes, green chiles and sugar and stir to combine. Bring to a boil.
- Add the black beans and vinegar. Stir to combine.
- Add your choice of additional liquid and ¼ tsp. salt.
- Bring to a boil, then reduce heat to a strong simmer.
- At this point taste for seasoning. It should taste a little too salty and hot because the sweet potato and black beans are little salt and spice sponges.
- Simmer for 10-15 minutes, until it is no longer loose and soupy.
- Taste again and make any final adjustments to the seasoning.
- Cool then refrigerate.
- Refrigerate the filling and dough for the crust for 24 hours before assembling.
- To assemble, roll dough into two rectangles.
- Cut each into six 4½ x 7 inch sheets of dough that are between ⅛ and ¼ inches thick. Working with only one or two sheets at a time and keep the others covered and refrigerated.
- Carefully mound ½ of the filling on the center of a sheet of dough. Egg wash all the dough's edges. Fold to seal, pressing close to the filling to avoid air pockets. Fork crimp the sealed edge. You can trim the edges by cutting straight down with a bench knife.
- Rest the filled hand pies in the refrigerator for 30 minutes.
- Preheat your oven to 325°F.
- Put assembled hand pies on baking sheets lined with silicone mats or parchment paper.
- Egg wash the top of each and sprinkle a little smoked paprika and flake salt. Using the tip of a knife, cut two small air vents into each pie.
- Bake for 20-25 minutes or until the bottom is a deep golden brown.
4. Virginie Strub's Lemon Cream Pie
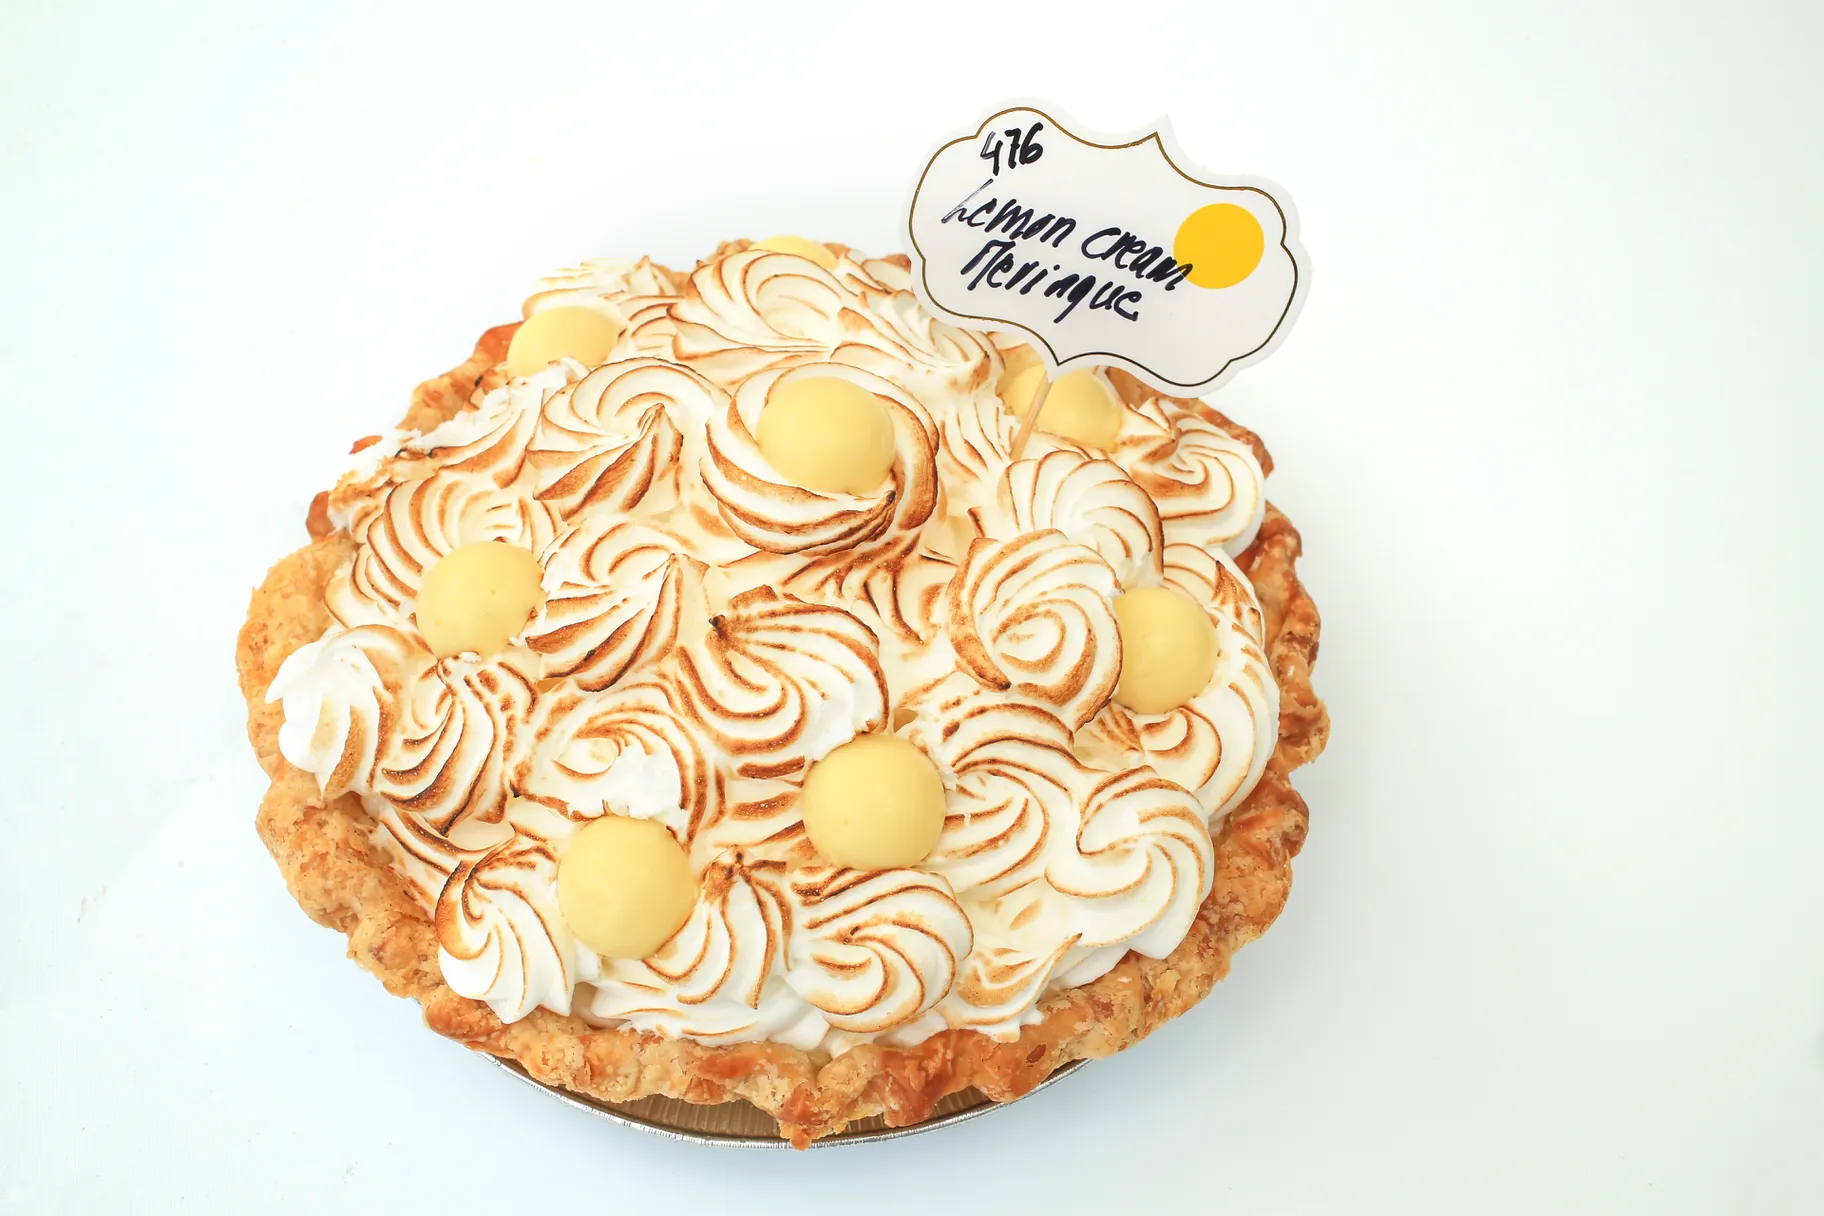 Virginie Strub's Lemon Cream Meringue pie was voted Prettiest Pie. Photo by Ian Kose
This Lemon Cream Pie by Virginie Strub won the Prettiest Pie Award.
Virginie Strub's Lemon Cream Pie
Day 1: Lemon Cream with Lemon Basil
Equipment
- 1¼ inch diameter (or smaller) half spheres silicone molds
Ingredients
- 80g freshly squeezed lemon juice
- 5-6 fresh lemon basil stems
- 90g sugar
- 180g whole eggs
- ¼ lemon zest
- 75g soft unsalted butter
- pinch sea salt
- ¾ sheet gelatin (silver grade gelatin – 180 bloom power)
Instructions
- Combine the lemon juice and lemon basil in a vacuum seal bag and vacuum seal the bag to enhance the flavor.
- Refrigerate for at least 12 hours (24 hours is recommended).
- When the lemon/lemon basil mixture is ready, remove the lemon basil and weigh it. You want 64g of the lemon/lemon basil mixture.
- Bloom your gelatin. Mix the lemon/lemon basil juice with half of the sugar. Mix the eggs with the second half of the sugar.
- Mix the lemon/lemon basil juice mixture with the egg mixture. Add the lemon zest and salt. Heat/whisk the mixture over a water bath to 80°C-82°C (176°F – 179°F) or until it thickens. When the desired temperature is reached, whisk in the bloomed gelatin right away then strain the mixture through a fine mesh sieve.
- Let cool to 60°C (140°F) and add the butter in and hand blend.
- Pipe the cream in the silicone molds and store in the freezer.
Day 2: Crust for a 9-inch Pie
Ingredients
- 150g all-purpose flour
- ¼ tsp. sea salt
- 2g / 1 tsp. sugar
- 113g cold unsalted butter - cubed
- 60g / ¼ cup ice water + more if needed
Instructions
- Combine flour, sugar, salt and cubed butter. Flatten the butter between your fingers/palms into big shards (the size of walnut halves) and toss through the flour.
- When all the cubes are flattened and coated in flour, make a well in the center of the flour mixture and add about half the water. Using your hands, toss the flour with the water to start to mix the two together. Keep adding water 1 tsp. at the time until the dough is uniformly combined and holds together.
- Let the dough rest for a few hours in the fridge.
- Roll the dough into an even disk and line the pie plate and crimp.
- Refrigerate for 30 minutes.
- Place a rack in the lower 3rd of the oven then place a baking sheet on the rack and preheat the oven to 425°F.
- Dock the bottom and sides of the pie crust with a fork.
- Line the pie plate with a piece of parchment paper and fill it with pie weights all the way to the top of the crust.
- Bake for 15 minutes or until the edges appear set and are just starting to lightly brown.
- Remove the pie weights and bake for an additional 2 minutes.
- Cool completely.
Day 2: Light Almond Cream with Lime
Ingredients
- 90g almond flour
- 70g powdered sugar
- 80g whole eggs
- Zest of 1 small lime
- 13g cornstarch, sifted
- 15g melted butter
- 24g egg whites
- 24g sugar
Instructions
- Place a rack in the lower 3rd of the oven then place a baking sheet on the rack and preheat the oven to 350°F.
- In a mixing bowl, whip egg whites on medium speed for 30 seconds, then gradually add the sugar. Whip the meringue to a semi stiff peak. Set aside.
- Combine almond flour and powdered sugar and sift.
- In a bowl, mix the eggs and zest with a hand blender.
- Whisk in the sifted almond flour/powdered sugar. Add the sifted corn starch and melted butter.
- Fold in the meringue in 2 times.
- Pipe 200g of almond cream with lime in the bottom of the par baked crust.
- Place the crust on the hot sheet pan and bake for 20-25 minutes until the almond cream is golden.
- Cool completely.
Day 2: Lemon Cream
Ingredients
- 180g sugar
- 128g freshly squeezed lemon juice
- 160g whole eggs
- ½ lemon zest
- 150g unsalted butter
- ⅛ tsp sea salt
Instructions
- Use the same method as you did to make the lemon cream with lemon basil minus the gelatin step.
- When the cream is done and cool, pipe it on top of the fully baked pie crust.
- Refrigerate while making the Italian meringue.
Day 2: Italian Meringue
Ingredients
- 185g egg whites
- 1 pinch of cream of tartar
- 1 pinch of salt
- 300g sugar
- 50g glucose
- 80g water
Instructions
- Whisk the egg whites, salt and cream of tartar at low speed.
- Combine the water, glucose and sugar and boil to 120°C (248°F). When the syrup reaches 110°C (230°F) turn the mixer up and whisk the egg whites at medium/medium high speed.
- Pour the hot syrup over the egg whites and whisk at high speed for a short time then on medium high until the meringue has cooled.
- Pipe the meringue on top of the lemon cream and toast the meringue using a kitchen torch.
- Unmold the lemon/lemon basil cream spheres and place them on top of the meringue.
5. Oliver Kaplan's Blueberry Pie Recipe
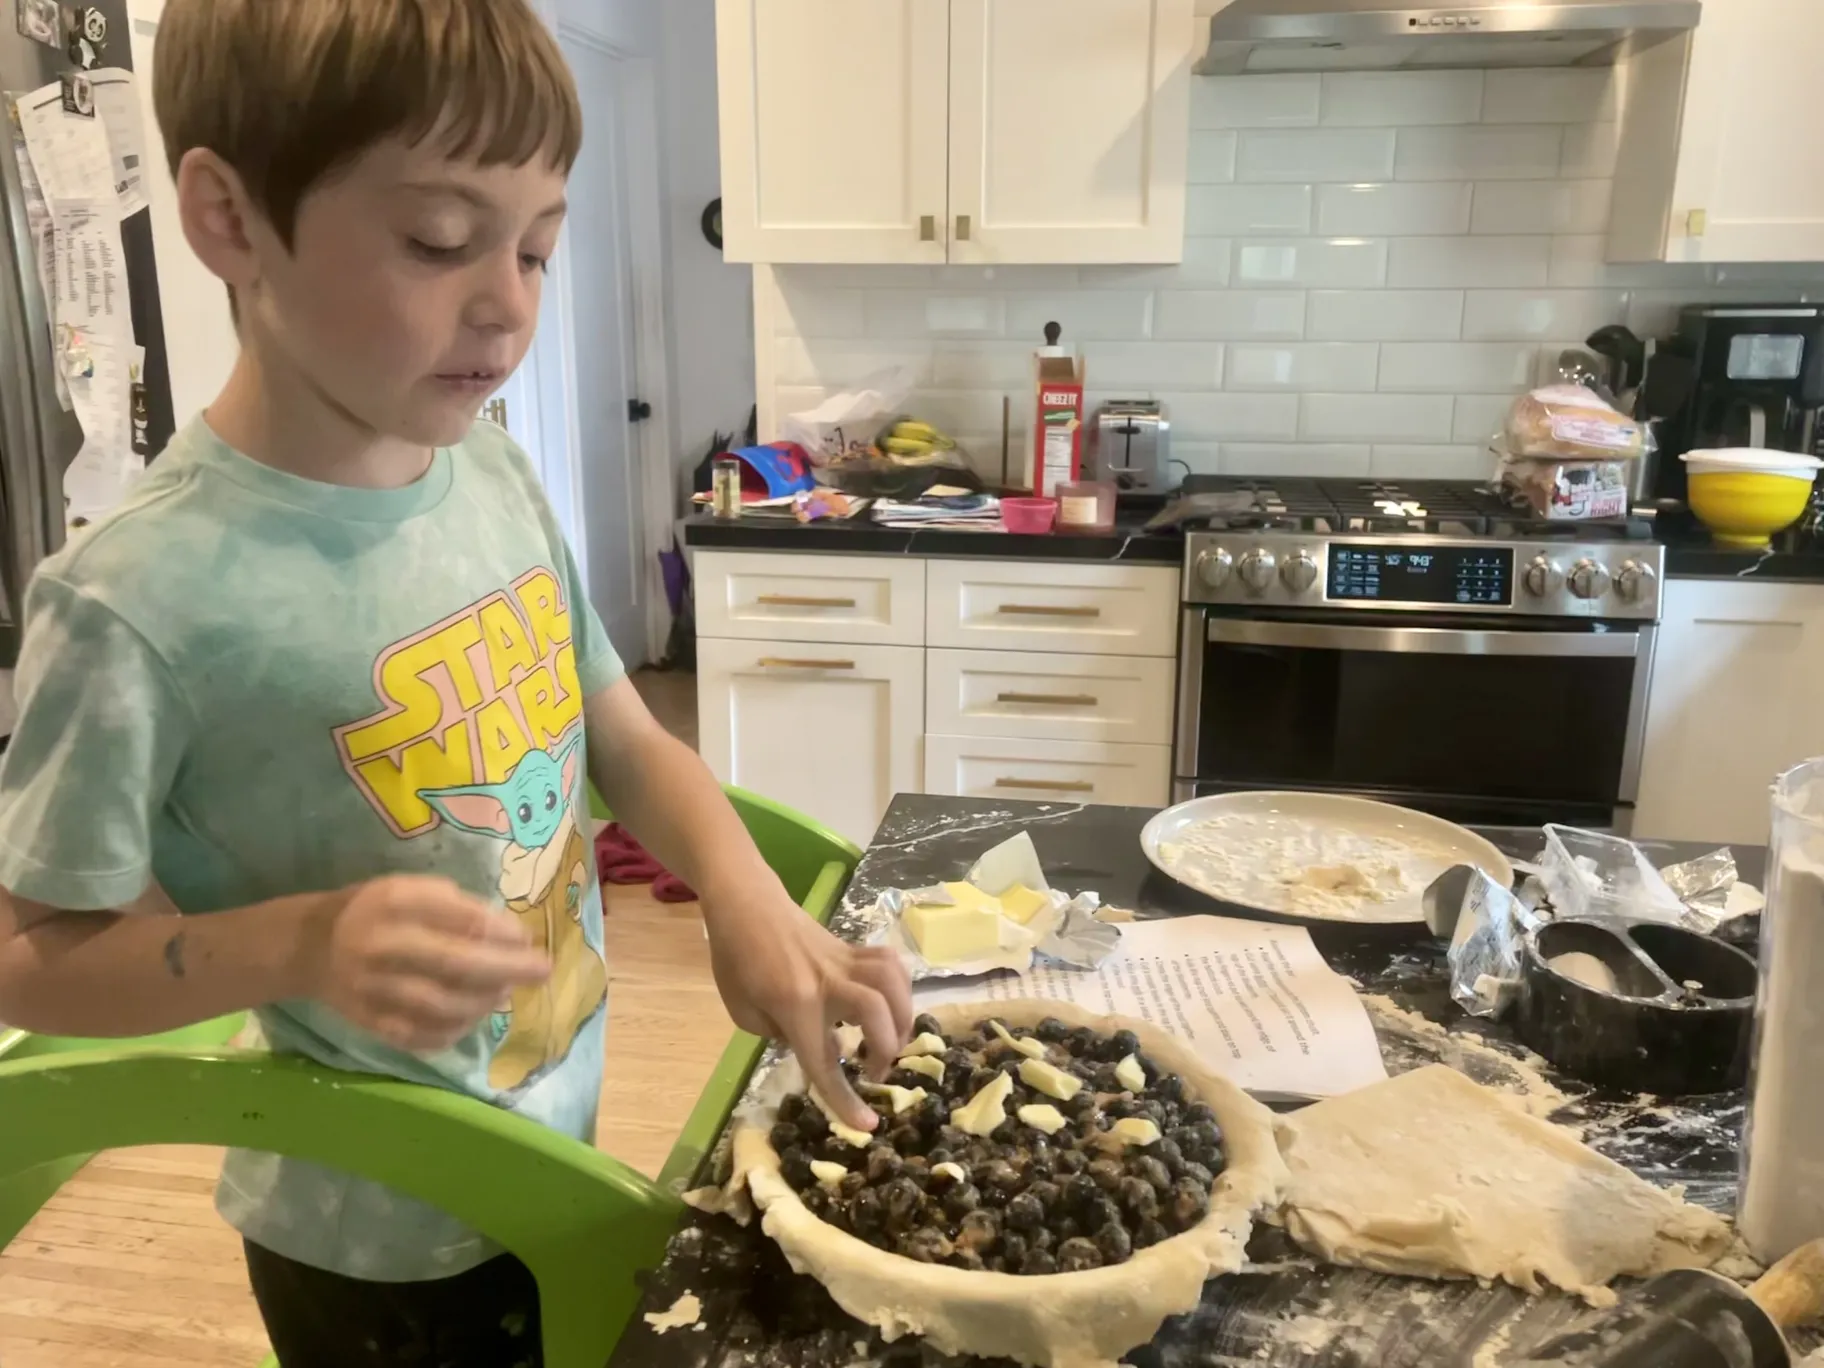
Oliver Kaplan prepares his award-winning blueberry pie. Photo by Erin Kaplan
Is it fair to call 7-year-old Oliver Kaplan a pie prodigy? We think so. The first grader only started making his own pies a year ago and took 1st place in the Kids category this year. What are the secrets to his sumless? Love, care and Crisco. He shared more details with Evan Kleiman. Click here to listen to his Good Food interview.
Oliver Kaplan's Blueberry Pie Recipe
Ingredients
- ¾ cup Crisco
- 2⅓ cups flour + more flour for rolling out the crust
- ¾ tsp. salt
- ½ cup sugar
- ½ tsp. cinnamon
- 1 cup ice water
- 2 pints blueberries
- 1 lemon
- 2 tbsp. butter
- a little milk
Instructions
- Preheat the oven to 425°F.
- Put Crisco, 2 cups of flour and salt in a bowl.
- Mix it together with a pastry cutter until the pieces are small, like peas.
- Make a well. Put 6-8 tbsp. of ice water in the well.
- Mix the dough with a fork and your hands.
- Make a ball.
- Put the dough ball on a plate and cover with the bowl.
- In a small bowl, add sugar, ⅓ cup of flour and cinnamon.
- Mix together with a fork.
- Wash blueberries and pick off the flowers.
- Put the blueberries in a large bowl.
- Cut a lemon in half. Squeeze juice from half the lemon into a cup and remove the seeds.
- Add the sugar and spice mixture along with the lemon juice to the big bowl with the blueberries. Mix and set aside.
- Now, it's time to roll out the dough for the crust. Clear your workspace and sprinkle flour on the counter.
- Cut the dough ball in half. Take the bigger half and press down to make it flat.
- Roll the dough into a circle. It must be big enough to fill the pan.
- Fold in quarters to transfer to the pan.
- Unfold and press it down. Use ice water to fix rips.
- Roll out the second half of the dough for the top.
- Pour the blueberries into the bottom crust.
- Cut butter and sprinkle it on top of the blueberries.
- Use your fingers to put ice water around the edge of the bottom crust.
- Fold the top crust into quarters and place it on top of the blueberries.
- Crimp the edges of the crust together.
- Cut a couple holes in the top of the crust.
- Put a little milk in a small bowl and brush it on top of the crust.
- Sprinkle the top crust with sugar.
- Put the pie pan on top of a cookie sheet. Place the pan in your preheated oven.
- Bake 35-45 min. Set timer for 35 min to check if it is brown and bubbly.
- Remove pie from the oven. Place on a trivet to let it cool.
6. Scott Blindauer's Award-Winning Crust Recipe
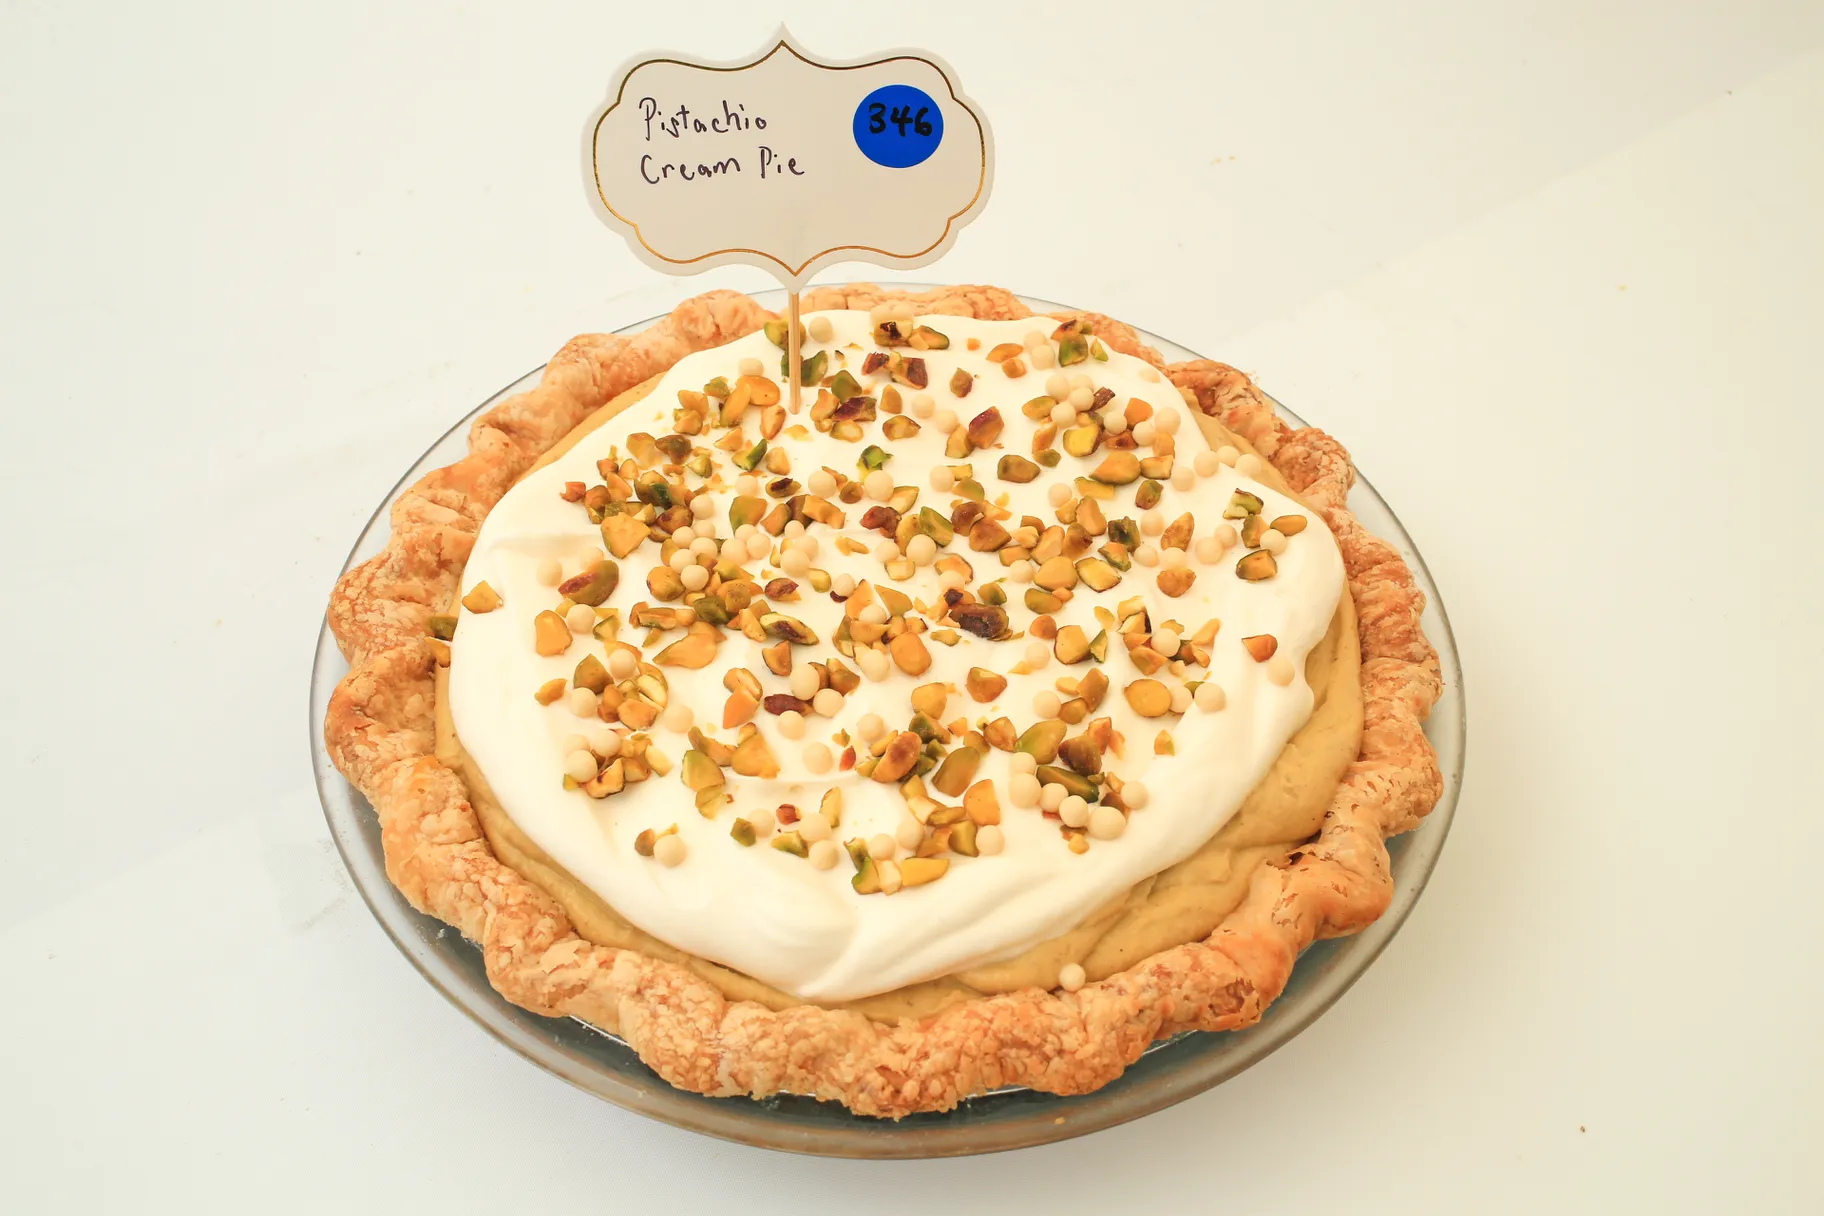 Scott Blindauer's Pistachio Cream Pie didn't win in its category but it did earn Best Crust, beating out some stiff, crumbly competition. Photo by Ian Kose
Scott Blindauer made a Pistachio Cream Pie (#346) that won Best Crust. Here is his recipe for one 9"-10" single crust pie dish.
Scott Blindauer's Award-Winning Crust Recipe
Ingredients
- 6 oz. butter or 1½ sticks (I used a brand with an 82% milk fat content)
- 6 oz. all purpose flour or 1¼ cups
- .375 oz. granulated sugar or 2½ tsps
- 1⅛ tsp. kosher salt
- 3 oz. cold water
Instructions
- Cut the butter into ½" sized cubes and keep cold until ready for use.
- In a medium bowl, whisk together the flour, sugar and salt.
- Measure out the water and set it inside the fridge while you proceed with the next steps.
- Dump the cubes of butter into the flour mixture and toss them around to coat the cubes in the mixture.
- Take each cube and squeeze it between your thumb and index finger to squish it into a flat amoeboid shape. Continue to toss around the flattened butter in the flour mixture as you go so it stays coated with flour.
- Once all of the butter has been flattened, remove the cold water from the fridge and pour it into the bowl. Using a spoon, fork or spatula, toss the water into the flour mixture. Try to get as much of the flour mixture moistened with the water but you probably won't get all of it moistened, which is ok.
- Take a spoon or a flexible silicone spatula and knead the dough together in the bowl just until most of it is sticking together. It will look like a big unruly clump of dough but that's the way it is.
- Dump the dough onto a very well floured work surface and pat it into a square. (Note, you are probably going to need a lot of flour at this point which is absolutely ok for this recipe.)
- Flour the top of the dough and begin rolling it into a rectangle that's 8"-10" long and 5"-6" wide. It's easier to roll the dough away from you so the short side of the rectangle is facing you. Again, use as much flour as you need under the dough and on top. Continue to rotate the dough around and flip it around to prevent it from sticking.
- Once you've rolled the dough out into the rectangle, you will fold each of the short sides to the center of the rectangle so they meet at the middle, leaving about a quarter of an inch between the two edges in the middle. Then, fold one side over the other side so that you have a big brick. Finally, fold the big brick in half so now you've got a big squarish block.
- Try to fold the corners of the block under the dough to round them out. This makes it a little easier to roll the dough into a disc but it isn't necessary.
- Flour your work surface again — use as much flour as you need — and roll the dough into a disc that's about ⅛" to ¼" inch thick and at least an inch wider than your pie plate. As you roll, remember to flour the work surface, rotate the dough and flip it over at times to prevent it from sticking.
- Once you have the desired size, dust any remaining flour from the surface of the dough and place it into the pie plate, pressing it gently along the bottom and sides to help it stay in place. Wrap the pie dough in plastic wrap and place it in the fridge for at least 2 hours.
- After the 2 hours is up, take the dough out of the fridge, trim the edges and crimp them. Poke the bottom of the dough all over with a fork.
- To fully bake the dough, line the plate with aluminum foil, fill it with pie weights — make sure it has a lot of weights and they come close to the top rim of the plate — and place it in the freezer for 20-30 minutes.
- When ready to bake the dough, preheat your oven to 350°F. Remove the pie plate from the freezer and place it on a rimmed baking sheet. Bake the dough for 45 minutes, rotating it 180 degrees every 15 minutes.
- After 45 minutes, carefully remove the aluminum foil with the pie weights from the pie plate.
- Return the pie to the oven and bake for another 20-25 minutes or until the bottom of the dough looks dry. While baking, keep an eye on the edges of the dough to make sure they aren't getting too dark. At this point, I usually end up placing a pie shield on the edges. You can also cut strips of aluminum foil and line the edges with that. The bottom will puff up some but will deflate a bit once the dough cools.
- Remove the fully baked pie crust from the oven and let cool fully before filling.

